Introduction
Building an Arduino based chicken door is not a very complicated thing to do. There are several providers on the market but if you want to build it by yourself, you can easily do it. I have tried my best to keep everything as simple as possible.
Material
I use a Arduino Nano with an ATMega328P as the “brain” of the chicken door. At first I tried the ESP8266 for wireless connectivity, but that did not have enough digital in/ and outputs for all the sensors and switches.
Arduino Nano: https://amzn.to/2LD6QdN
The Motor driver powers the motor and lets you reverse direction
Motor driver: https://amzn.to/2K45nuX
The reed-switches are used to find out if the door has hit it’s top or bottom end point.
Reed switch: https://amzn.to/34Y1JfM
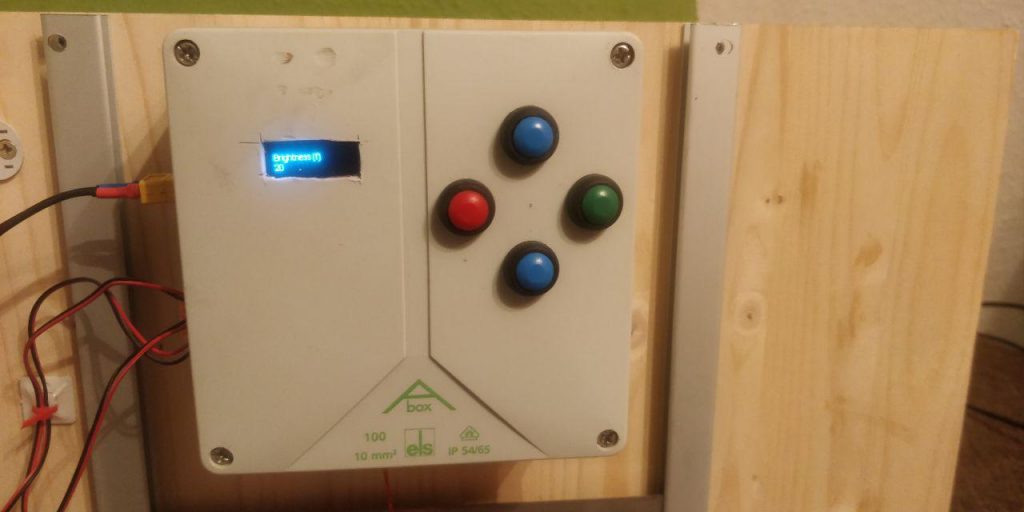
The mini pushbuttons are used to control and configure the board
Mini Pushbuttons: https://amzn.to/34VJ3NR
The user UI
OLED display: https://amzn.to/2Oglhbc
The light sensor is used to find out if it is dark or not.
Light Sensor: https://amzn.to/2Go7E35
As the Arduino Nano does not have a built in real time clock, we have to attach one so we can also control the door using times
Realtime Clock: https://amzn.to/2YdPeIK
The motor is used to move the door
Motor: https://amzn.to/2OhJs9h
Soldering Breadboard: https://amzn.to/2SDMhjp – use a regular one if you are not experienced.
A 200 Ohm resistor for the voltage divider (big pack here: https://amzn.to/2YrpAnG) but you really only need one!
Terminals to attach the switches: https://amzn.to/2Oqf0tk
H-Profile: https://amzn.to/2JOC8Ob
Rope: https://amzn.to/2SyEKCi
The door: https://amzn.to/2LFpbs8
These are all Amazon Affiliate links. When you buy using this link, I get a small share but your purchasing price does not change.
In addition, you need a couple of wires (for the breadboard and for the switches), tools like screwdrivers, drills and a handful of screws. If you want, you can also 3d-print your own box for that. If you design a nice box for the chicken door, please let me know and I’ll happily include the stl’s in my github repo.
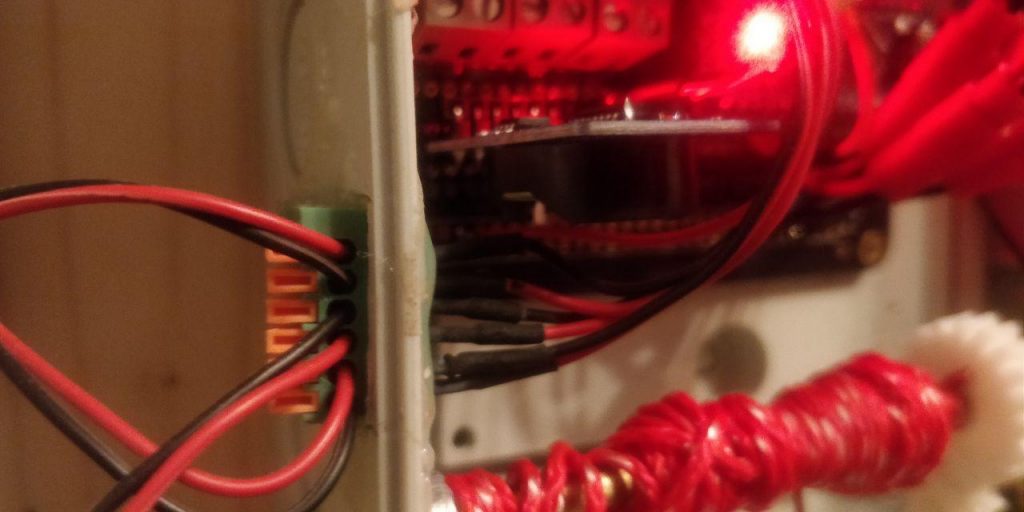
Putting the electronics together
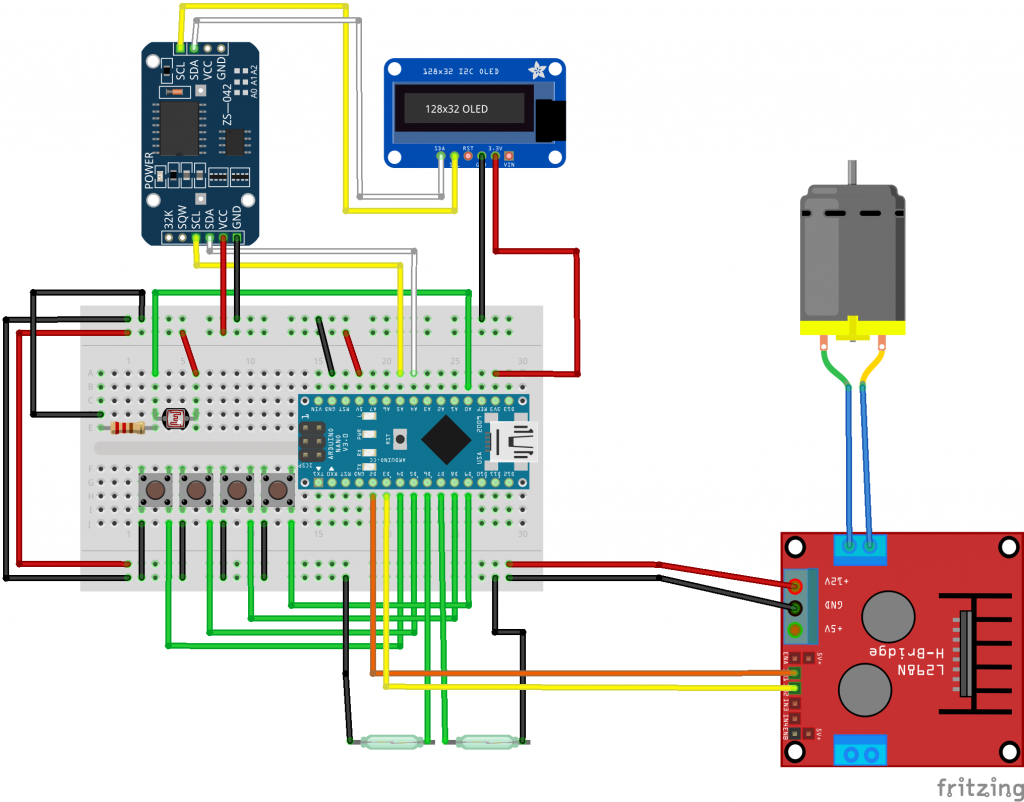
For soldering I use soldering breadboards (half size) as this greatly simplifies the cabelling/soldering.
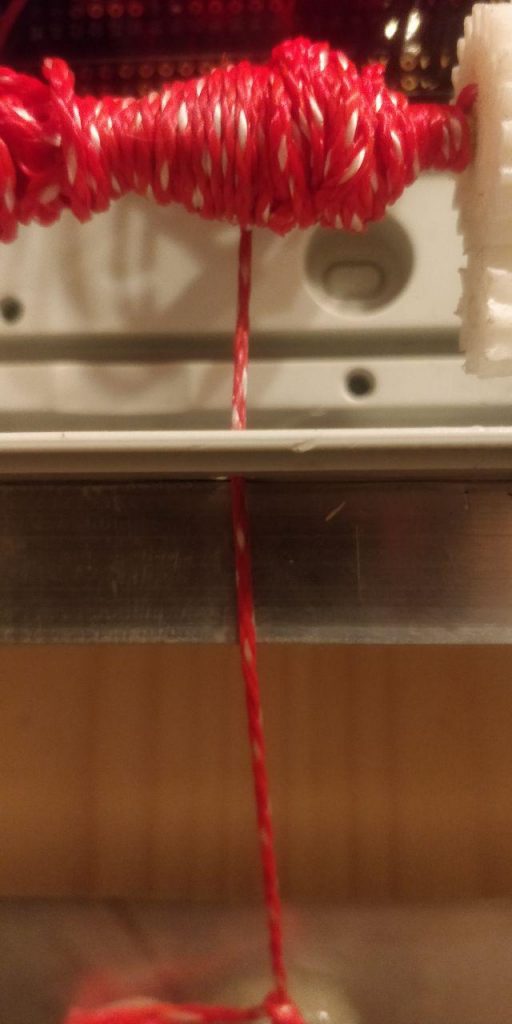
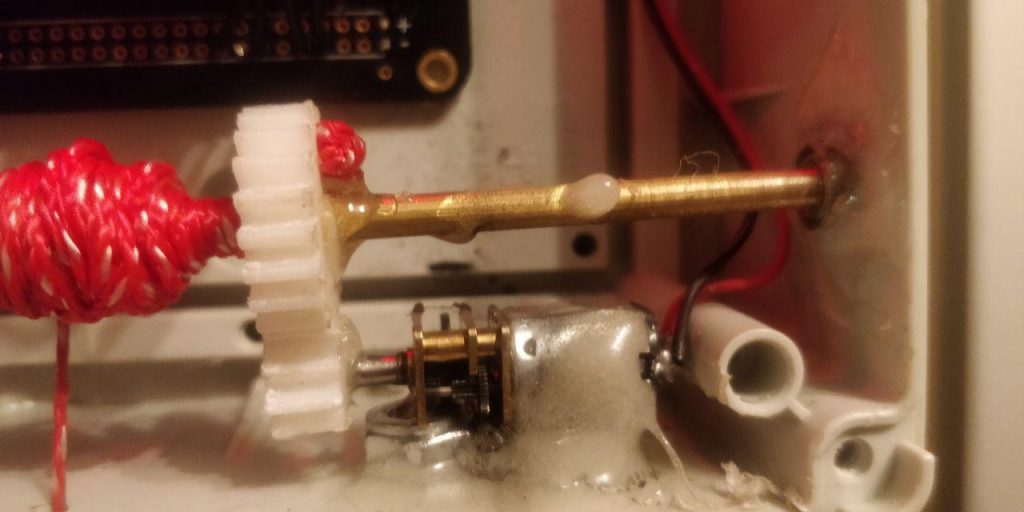
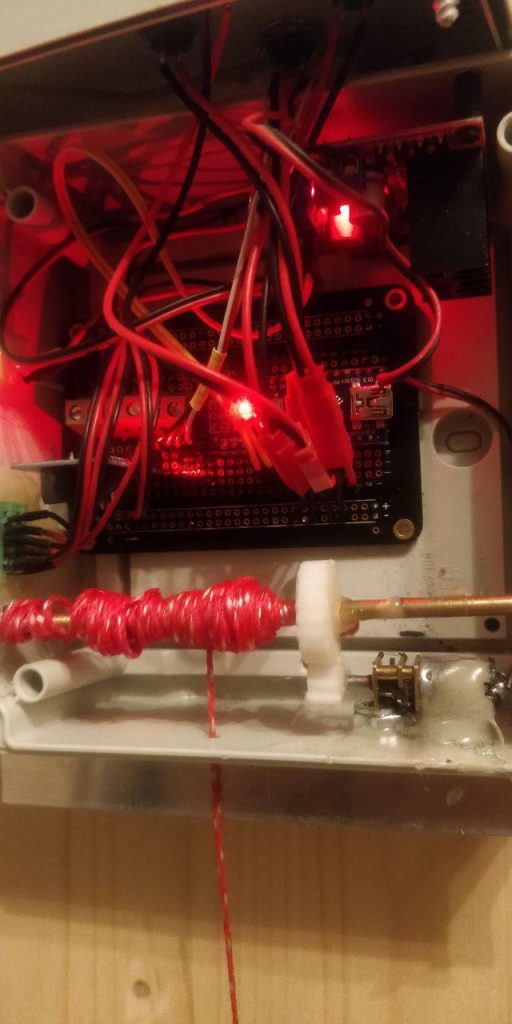
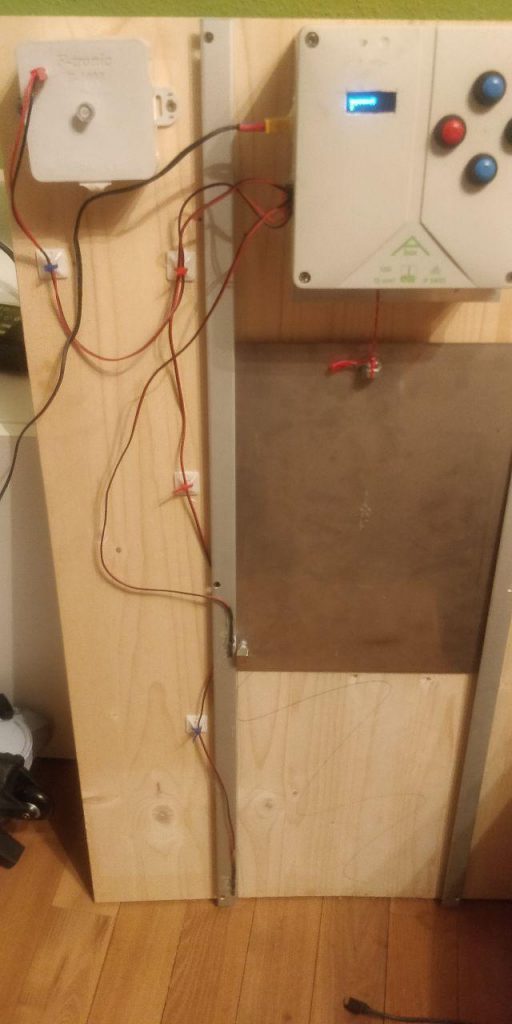
The mechanics
Here you see pictures of the testing setup. I leave it in the garden for now ti check if it behaves as expected. I don’t want to lock in the chicks 🙂
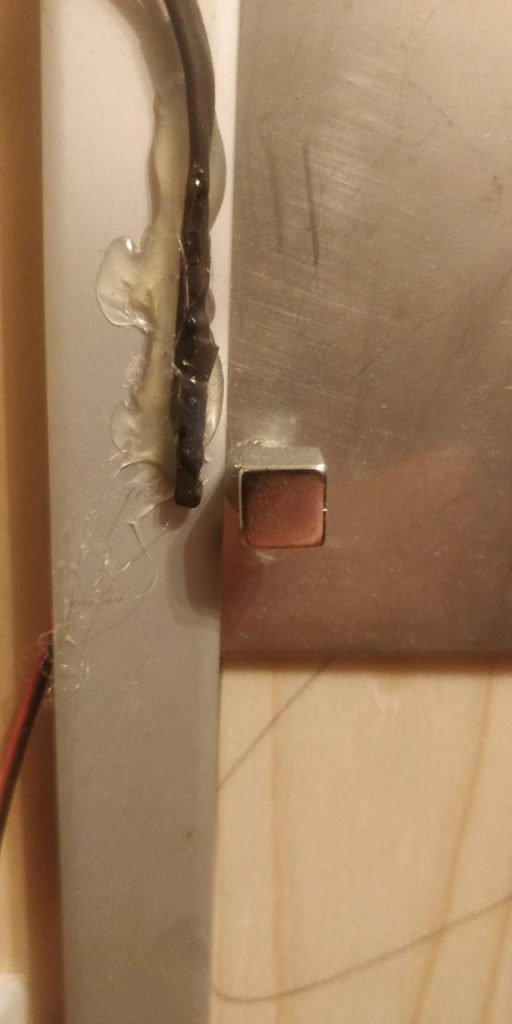
Make sure you put everything into closed box to avoid that mite sit in there. Do not use hot glue but prefer epoxy glue to put everything together
RTC Library
The library for the real time clock
https://github.com/adafruit/RTClib
https://learn.adafruit.com/ds1307-real-time-clock-breakout-board-kit/overview
SSD1306 ASCII Library
A small library greatly simplifying the display of two lines on our display
https://github.com/greiman/SSD1306Ascii
The arduino code
I have set up a couple of tabs in the Arduino IDE as this keeps the code easy to understand.
Klappe1
the init code and the loop-function. At first I need a function prototype for set_display in order to support a default value for the second line. More on this in the display-section
Then I have set up a small block with the code you are most likely to modify when you don’t want to go too much into detail
// Values for opening/closing the door - configure only this…

int hours_open=07;
int minutes_open=30;

int hours_close=15;
int minutes_close=0;

int bottom_light_threshold=10;
int top_light_threshold=15;
Then I include the RTC and OLED libraries and create respective objects
#include <DS3231.h>
#include <Wire.h>
#include "SSD1306Ascii.h"
#include "SSD1306AsciiWire.h"

// DS3231 RTC
DS3231 Clock;

bool Century=false;
bool h12;
bool PM;
byte ADay, AHour, AMinute, ASecond, ABits;
bool ADy, A12h, Apm;

String date_delimiter=".";
String time_delimiter=":";

// SSD1306 OLED
#define I2C_ADDRESS 0x3C
#define RST_PIN -1
SSD1306AsciiWire oled;
Next I define the input/output pins
// Buttons
int btn_up_pin = 4;
int btn_down_pin = 5;
int btn_ok_pin = 8;
int btn_back_pin = 9;


// Reed switches (Door)
int sw_top = 6;
int sw_btm = 7;


// Motor
int motor_pin1 = 2;
int motor_pin2 = 3;


// Light sensor
int lightsensor_pin=A0;
Define global variables with respective values
int light_intensity;                                 // Container for the currently measured light intensity
int flattened_light_intensity;
bool bottom_light_threshold_passed=false;            // flag if the threshold has been passed after the n measures
bool top_light_threshold_passed=false;               // flag if the threshold has been passed after the n measures

int number_of_light_measures=3;                      // number of measures
int measure_interval=5;                              // measuere every n seconds
int light_measures[3];
int second_measured;
int light_measure_counter=0;


// Idle Display variables
char* idle_display_content="flattened_brightness";   // brightness, flattened_brightness, datetime or temperature
String buf_line1;
String buf_line2;
int display_delay=1000;                              // delay after each interaction


// Door states
bool door_is_up=false;
bool door_is_down=false;


// Operating states (start in auto-state)
bool is_auto_state=true;
On the last line, the door is set to auto-mode. that means it follows the programme logic. If not in auto-mode, the door ignores times and only follows the up-down buttons.
The loop function
The loop-function controls the display and check if we are in auto-mode or not. If not, look at the buttons, if so, use time and brightness
void loop() {

  light_intensity=get_light_intensity();

  //idle display
  if(is_auto_state){
    if(idle_display_content=="flattened_brightness"){
      set_display("Brightness (f)",String(flattened_light_intensity));
    }
    if(idle_display_content=="brightness"){
      set_display("Brightness",String(light_intensity));
    }

    else if(idle_display_content=="temperature"){
      set_display("Temperature",String(get_temperature()));
    }

    else if(idle_display_content=="datetime"){
      set_display(get_date_string(), get_time_string());
    }

    else if(idle_display_content=="off"){
      set_display("", "");
    }

  } else {
    set_display("Manual Mode!!");
  }


  //toggle the auto state on the green button.
  if(buttonstate(btn_ok_pin)){
      set_auto_state(!is_auto_state);
  }


//auto mode - look at time/brightness to move the doors
  if(is_auto_state){
    set_passed_threshold();

    if(door_should_be_open() and door_is_down){
      door_up();
    }

    if(!door_should_be_open() and door_is_up){
      door_down();
    }


// manual mode - use the buttons
  } else {
    if(buttonstate(btn_up_pin)){
      door_up();
    }

    if(buttonstate(btn_down_pin)){
      door_down();
    }
  }


  delay(200);
}
Buttons
The Buttons-Tab contains simple logic to read from a digital input
// returns the state of the buttons

bool buttonstate(int buttonpin){
  int buttonState = digitalRead(buttonpin);

  if (buttonState == HIGH) {

    return false;
  } else {

    return true;
  }
}
Display
The display makes use of the set_display function prototype in the init section. The function controls the display.
- Checks if there is new data to be displayed.
- If so, replace the data in the buf_line1/2
- display the new text
// set the display. Comparing lines to display with lines already displayed to avoid flickering.

void set_display(String line1, String line2){
  if(line1!=buf_line1 or line2!=buf_line2){
    buf_line1=line1;
    buf_line2=line2;
    oled.clear();
    oled.println(buf_line1);
    oled.print(buf_line2);
  }
}
Door
This tab contains code to control the door and check the connected reed-switches
bool is_top(){
  return buttonstate(sw_top);
}

bool is_bottom(){
  return buttonstate(sw_btm);
}

void door_stop(){
  set_display("Stopping door");
  digitalWrite(motor_pin2, LOW);
  digitalWrite(motor_pin1, LOW);

}

void door_up(){
  if(is_top()){
    door_is_down=false;
    door_is_up=true;
    return;
  }
  digitalWrite(motor_pin1, HIGH);
  digitalWrite(motor_pin2, LOW);
  set_display("Moving up");
  while(!is_top()){
    if(buttonstate(btn_back_pin)){
      door_stop();
      delay(display_delay);
      set_auto_state(false);
      return;
    }
    delay(50);
  }
  door_stop();
  door_is_down=false;
  door_is_up=true;
  delay(display_delay);
  oled.clear();

}

void door_down(){
  if(is_bottom()){
    door_is_down=true;
    door_is_up=false;
    return;
  }
  digitalWrite(motor_pin2, HIGH);
  digitalWrite(motor_pin1, LOW);
  set_display("Moving down");
  while(!is_bottom()){
    if(buttonstate(btn_back_pin)){
      door_stop();
      delay(display_delay);
      set_auto_state(false);
      return;
    }
    delay(50);
  }
  door_stop();
  door_is_down=true;
  door_is_up=false;
  delay(display_delay);
  oled.clear();

}

bool door_should_be_open(){

  int opening_minutes=calc_minutes(hours_open, minutes_open);
  int closing_minutes=calc_minutes(hours_close, minutes_close);

  if((opening_minutes<=get_current_minutes() and top_light_threshold_passed) and (closing_minutes>=get_current_minutes() or bottom_light_threshold_passed)){
    return true;
  }
  return false;
}

void set_auto_state(bool state){
  is_auto_state=state;
  if(state){
      set_display("Mode","Auto");
      delay(display_delay);
    } else {
      set_display("Mode","Manual");
      delay(display_delay);
    }
}
the most important one here is door_should_be_open(). Here is a good point to add Serial.println’s to troubleshoot any errors in the doors behaviour.
Light
The light tab does everything that is related to the light – read the value of the light sensor, flattens the read values and sets flags when top or bottom light thresholds have been passed.
int get_light_intensity(){
  return analogRead(lightsensor_pin);
}

// check if the light has passed the threshold. If so, set global var to true. If not, set to false
// The number of measures and the interval is set in the klappe-tab

void set_passed_threshold(){
  if(Clock.getSecond() % measure_interval == 0 and second_measured != Clock.getSecond()){
    second_measured=Clock.getSecond();
    light_measures[light_measure_counter]=light_intensity;
    light_measure_counter++;
    if(light_measure_counter==number_of_light_measures){
      int sum=0;
      for (int i = 0; i < number_of_light_measures; i++){
        sum+=light_measures[i];
      }
      light_measure_counter=0;
      flattened_light_intensity=sum/number_of_light_measures;

      // top threshold
      if(sum>=top_light_threshold*number_of_light_measures){
        top_light_threshold_passed=true;
      } else {
        top_light_threshold_passed=false;
      }

      //bottom threshold
      if(sum>=bottom_light_threshold*number_of_light_measures){
        bottom_light_threshold_passed=true;
      } else {
        bottom_light_threshold_passed=false;
      }
    }


  }
}
Setup
The setup-tab does all the initialisations of the hardware and displays a small greeting to the chicken
void setup() {
  Serial.begin(9600);
  Serial.println("Starting Setup");


  // set pin modes
  Serial.println("Pinmodes");
  pinMode(btn_up_pin,INPUT_PULLUP);
  pinMode(btn_down_pin,INPUT_PULLUP);

  pinMode(btn_ok_pin,INPUT_PULLUP);
  pinMode(btn_back_pin,INPUT_PULLUP);

  pinMode(sw_top,INPUT_PULLUP);
  pinMode(sw_btm,INPUT_PULLUP);

  pinMode(motor_pin1,OUTPUT);
  pinMode(motor_pin2,OUTPUT);


  // Start the I2C interface
  Serial.println("I2C");
  Wire.begin();
  Wire.setClock(400000L);


  // Start the the OLED
  Serial.println("OLED");
  #if RST_PIN >= 0
  oled.begin(&Adafruit128x32, I2C_ADDRESS, RST_PIN);
  #else // RST_PIN >= 0
  oled.begin(&Adafruit128x32, I2C_ADDRESS);
  #endif // RST_PIN >= 0
  oled.setFont(Arial14);

  // Use true, normal mode, since default for Adafruit display is remap mode.
  oled.displayRemap(true);
  oled.clear();


  // lower door as a start and greet whoever is there.
  set_display("Hello","Ladies");
  delay(3000);
  door_down();

  Serial.println("End of Setup");
}
Temperature
The temperature tab contains a very small function to read from the temperature sensor that is built into the real time clock
//temperature

int get_temperature(){
  return Clock.getTemperature();
}
Time
The time-tab contains a couple of functions to calculate the number of minutes into the day and build the Date/Time strings for the display.
int get_current_minutes(){
  int current_minutes=(Clock.getHour(h12, PM)*60)+Clock.getMinute();
  return current_minutes;
}


// Multiply hours with 60 and add minutes
int calc_minutes(int hour, int minute){
  int calc_minutes=(hour*60)+minute;
  return calc_minutes;
}


// Build the date string
String get_date_string(){
  int clock_day=Clock.getDate();
  int clock_month=Clock.getMonth(Century);
  String day_string=pad_two(clock_day);
  String month_string=pad_two(clock_month);

  return day_string+date_delimiter+month_string+date_delimiter+"20"+String(Clock.getYear());
}


// Build the time string
String get_time_string(){
  int clock_hour=Clock.getHour(h12, PM);
  int clock_minute=Clock.getMinute();
  int clock_second=Clock.getSecond();
  String hour_string=pad_two(clock_hour);
  String minute_string=pad_two(clock_minute);
  String second_string=pad_two(clock_second);

  return hour_string+time_delimiter+minute_string+time_delimiter+second_string;
}


// Function to pad with zero to two characters.
String pad_two(int nbr){
  String out;
  if(nbr<10){
    out="0"+String(nbr);
  } else {
    out=String(nbr);
  }
  return out;
}
Resources
You will find the full code, stl-meshes for the gears and the fritzing file in my github-repository. If you have any improvements please feel free to adjust the code as needed and send me pull requests for discussion. I am not a C++ pro, so I’d be happy about feedback.
If you build this, please send pictures of it and if you have and problems putting this together, let me know. If you need a better explanation of the code, I will add it here.
Cheers and thanks for reading all this
Andre